Snowflake
Snowflake is a data warehouse that offers fast storage, processing, and analytics solutions. Deepnote integrates with Snowflake seamlessly to bring the cloud data warehouse to your notebook.
What can you do with the Snowflake integration?
The Snowflake integration allows you to query databases and explore the structure of your warehouse. Think "SQL editor" but with all the modern productivity boosters that come with Deepnote's notebook. For example:
- Write native SQL and Python in the same notebook
- Search your entire warehouse instantly via the integrated schema explorer
- Get intelligent autocomplete for columns, tables, and databases
- Interactively explore data without writing any additional code
How to connect to Snowflake
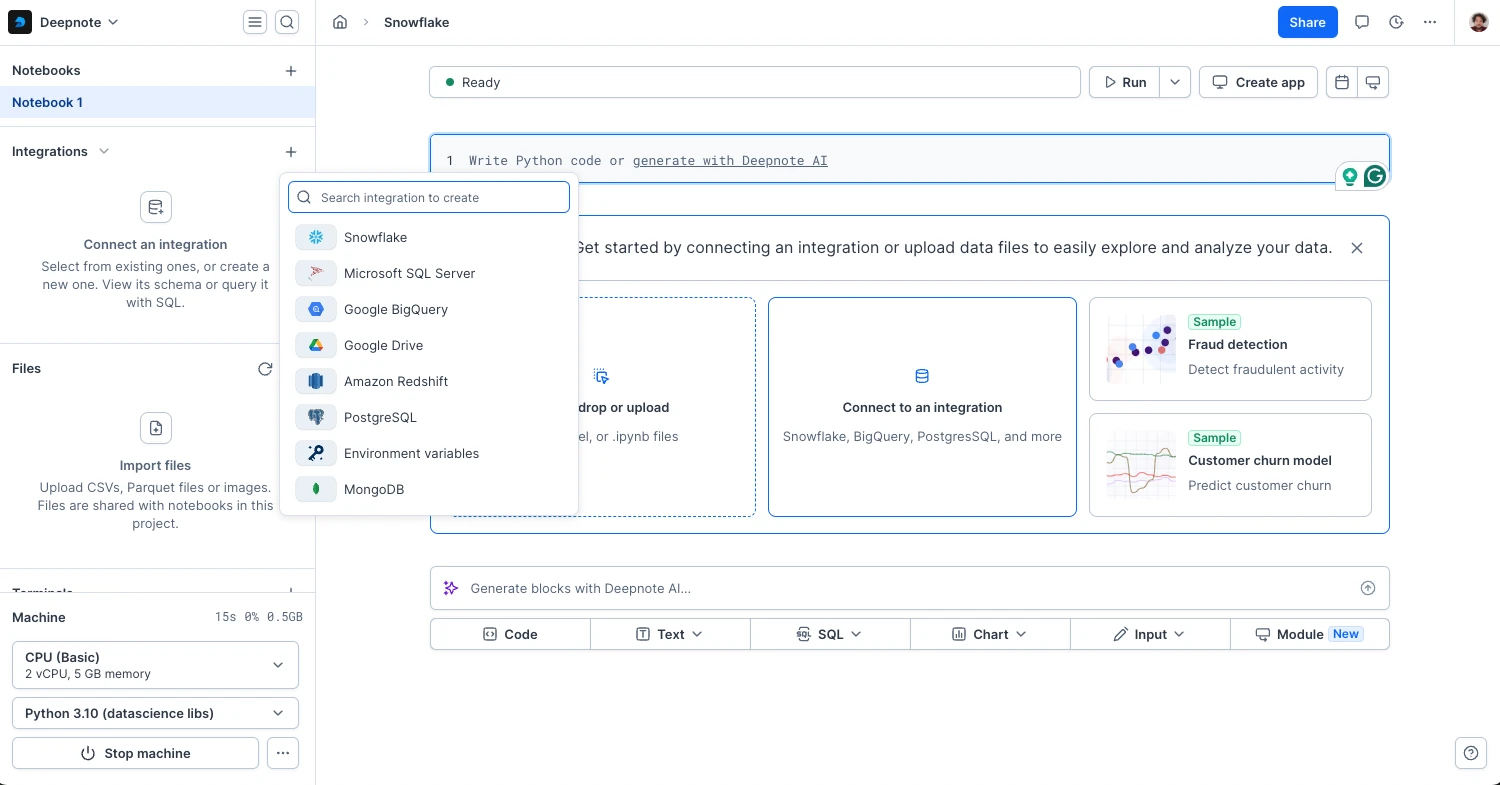
From the left-hand sidebar, under Integrations, click the + button and choose Create new integration.
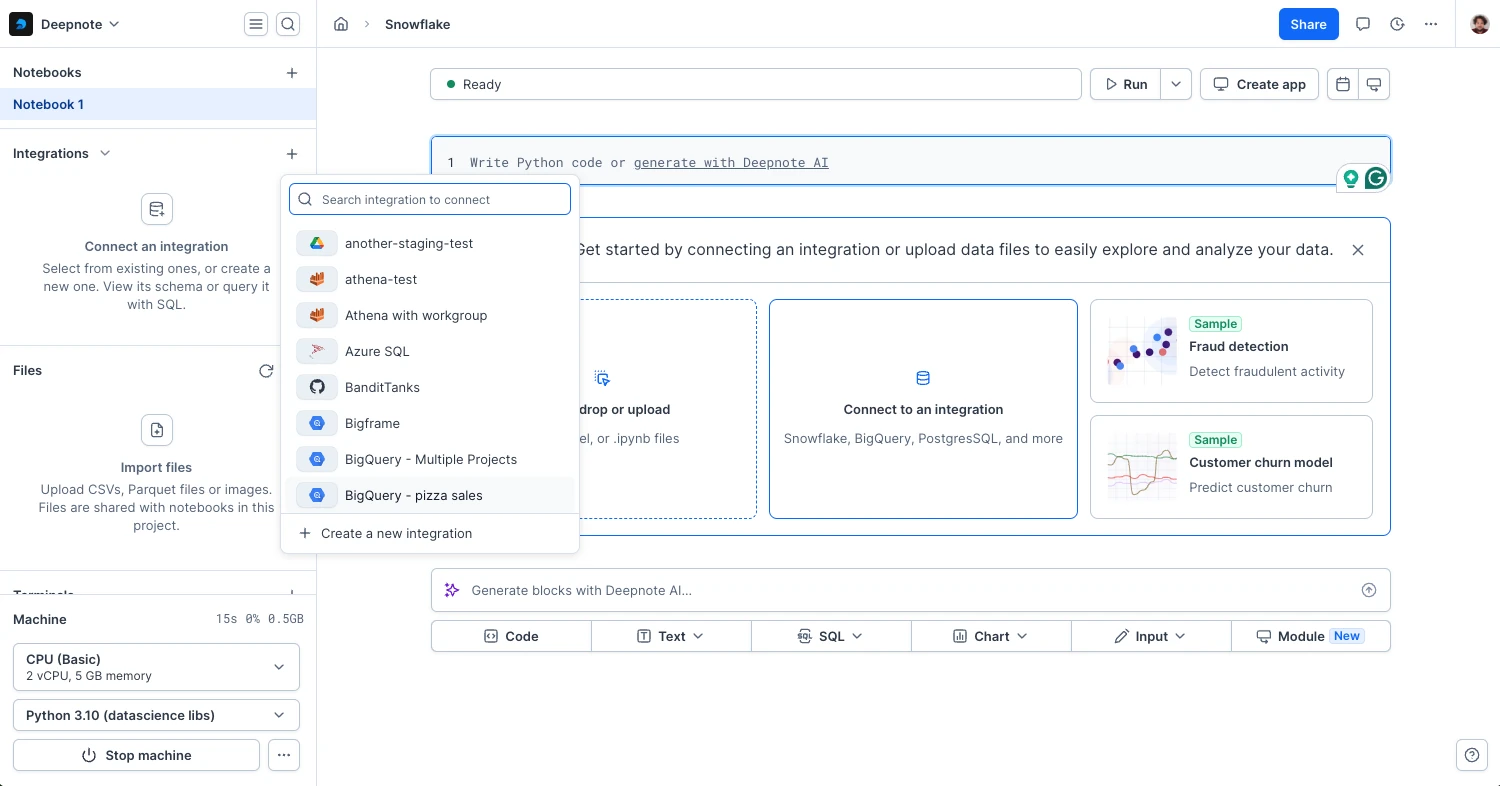
Select Snowflake from the list of integrations or search for it using the search bar.
Deepnote offers multiple authentication methods for connecting to Snowflake, giving you flexibility based on your security requirements and organizational policies.
Using Snowflake with username and password
The standard way to connect is using username and password authentication. Fill out the fields in the pop-up form including your account identifier for Snowflake and enter a valid username and password.
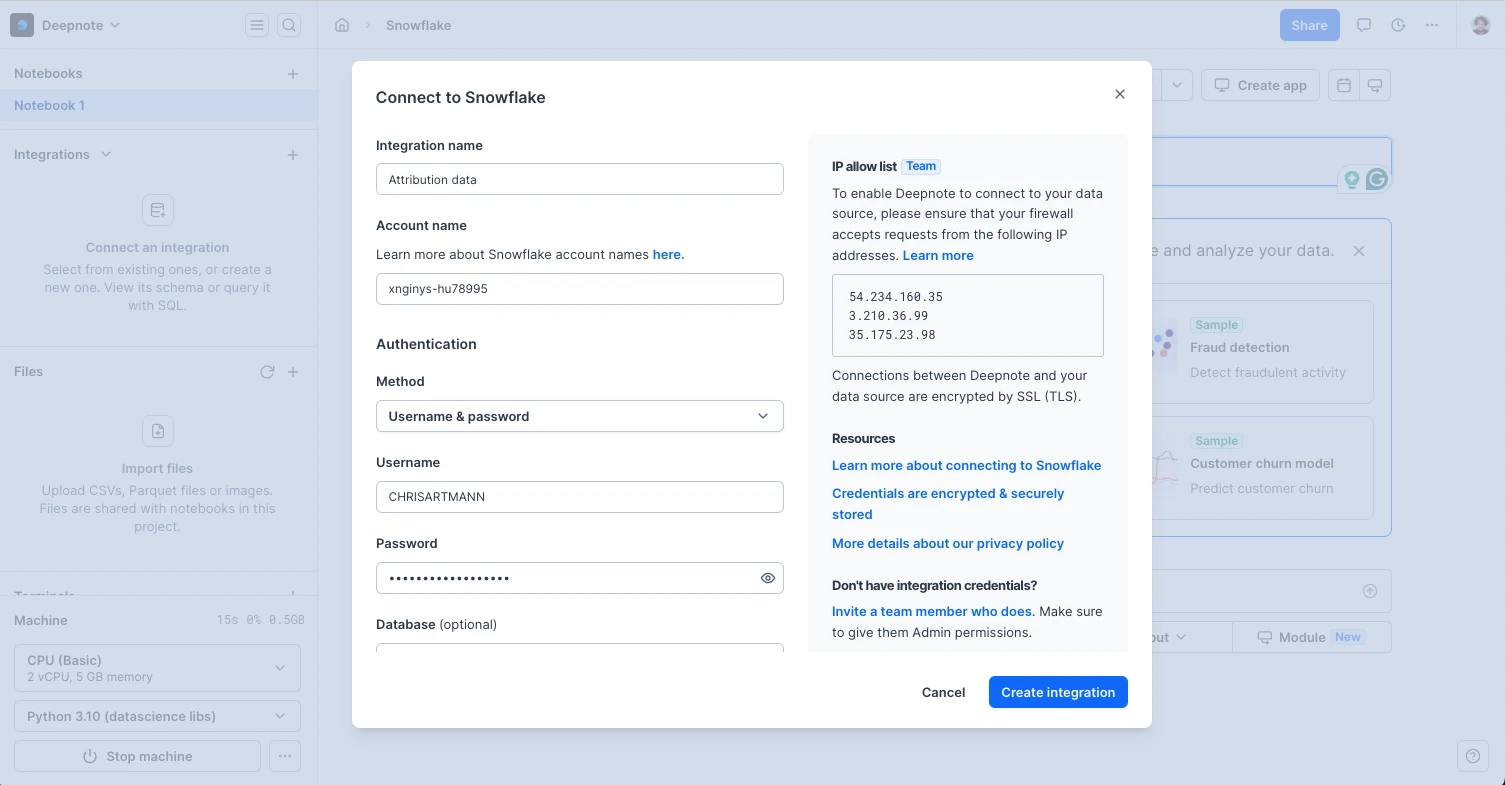
This authentication method is straightforward and works well for individual use or when sharing credentials within a team is acceptable for your workflow.
Using Snowflake with key-pair authentication
For enhanced security, Deepnote supports Snowflake's Key-pair authentication, allowing you to authenticate users with private keys instead of passwords.
When creating a Snowflake integration, select "Key-pair" as the authentication type. After creating the integration and connecting it to your project, users will be prompted to provide their username and private key when they first access Snowflake resources through the schema browser or when running queries.
Key-pair authentication provides a more secure alternative to password-based access while maintaining a seamless experience when working with Snowflake data in Deepnote.
Using Snowflake with OAuth
With a Snowflake OAuth authentication, you can give every member of your Deepnote workspace their own set of credentials. You can ensure higher security by using short-lived tokens and enabling the use of multi-factor authentication. Follow the principle of least privilege and use granular access control for various Snowflake resources to ensure everyone can only access the data they need.
Deepnote supports three OAuth providers for Snowflake:
Using Snowflake in Deepnote
Now that you're connected to Snowflake, you can do the following:
-
Click the newly created integration in the Integrations section to open the schema browser. Click here to learn more about the schema browser.
-
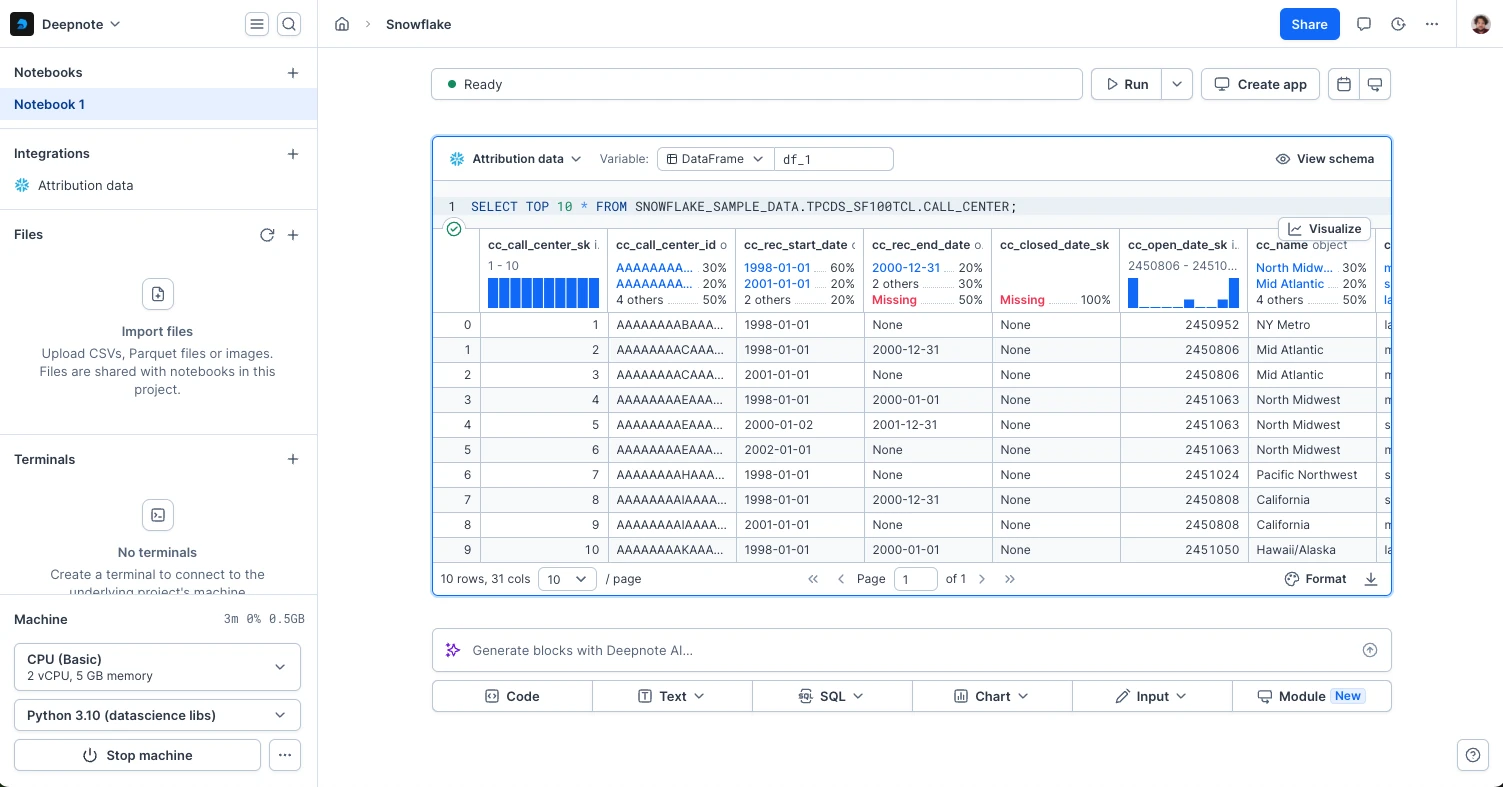
Create an SQL block that points to your warehouse and query your data. Autocomplete for columns, tables, and databases will be at your fingertips as you type. Click here to learn more about SQL blocks.
-
Explore column distributions as well as sorting and filtering capabilities on the results set. All results are displayed as an interactive pandas DataFrame. Click here to learn about interactive DataFrame output.
-
Pipe the results of your query into a chart block for rapid interactive data visualization. Click here to learn more about chart blocks.
Allowing Deepnote to access Snowflake
Depending on your Snowflake setup, you might need to explicitly allow Deepnote to connect to your Snowflake instance. This section covers how to check your current configuration and ensure Deepnote can successfully connect.
Checking your current network configuration
By default, new Snowflake accounts allow connections from any IP address. To verify your current setup, you can run:
SHOW PARAMETERS LIKE 'NETWORK_POLICY' IN ACCOUNT;
If this returns no results or a null value, your account has open access and Deepnote should be able to connect without additional configuration.
If your Snowflake account has a network policy that restricts IP addresses, you'll need to add Deepnote's IP addresses to your allow list. This is common in production environments or organizations with strict security requirements.
Adding Deepnote to an existing network policy
If you already have a network policy, you'll need to modify it to include Deepnote's IP addresses:
ALTER NETWORK POLICY your_existing_policy
  SET ALLOWED_IP_LIST = ARRAY_DISTINCT(
    ARRAY_CAT(
      ALLOWED_IP_LIST,
      [
        '107.22.50.0', '18.214.47.38', '3.217.84.43', '3.229.1.246',
        '3.230.201.213', '44.216.70.44', '52.21.216.28', '52.55.205.54',
        '54.144.37.244', '54.165.20.26', '54.235.42.8', '54.242.142.100',
        '138.199.245.32', '138.199.245.36', '148.251.31.233'
      ]
    )
  );
Replace your_existing_policy with the name of your current network policy.
Creating a new network policy for Deepnote
If you don't have a network policy yet but want to create one specifically for controlling access:
CREATE NETWORK POLICY deepnote_access
  ALLOWED_IP_LIST = (
    '107.22.50.0', '18.214.47.38', '3.217.84.43', '3.229.1.246',
    '3.230.201.213', '44.216.70.44', '52.21.216.28', '52.55.205.54',
    '54.144.37.244', '54.165.20.26', '54.235.42.8', '54.242.142.100',
    '138.199.245.32', '138.199.245.36', '148.251.31.233'
);
Then apply it to your account:
ALTER ACCOUNT SET NETWORK_POLICY = deepnote_access;
Important security considerations
When modifying network policies, remember these important points:
- Include your own IP addresses in the policy to avoid locking yourself out.
- Consider applying the policy to specific users rather than the entire account if you need more granular control:
ALTER USER deepnote_user SET NETWORK_POLICY = deepnote_access; - Account administrator privileges are required to manage network policies.
- The Deepnote IP addresses listed above may change over time as their infrastructure evolves.
By following these steps, you can ensure that Deepnote has the necessary access to connect to your Snowflake instance while maintaining appropriate security controls.
Connecting to Snowflake via Python
If you prefer to connect to Snowflake with pure Python, you may use the Snowflake connector as shown in the code example below.
import snowflake.connector

conn = snowflake.connector.connect(
  user='USER',
  password='PASSWORD',
  account='ACCOUNT',
  warehouse='WAREHOUSE',
  database='DATABASE',
  schema='SCHEMA'
)

conn.cursor().execute('select * from products')