BigQuery with Google OAuth
Deepnote allows each user to authenticate to Google BigQuery using their own credentials.
What can you do with BigQuery's Google OAuth?
With BigQuery's Google OAuth authentication you can give every member of your Deepnote workspace their own set of credentials. This ensures greater security by using short-lived tokens and enabling the use of multi-factor authentication. Follow the principle of least privilege and use granular access control for various BigQuery resources to ensure users can only access the data they need.
Setting up OAuth for BigQuery in Deepnote
To set up authentication to BigQuery via OAuth, navigate to the Google Cloud console and complete the following steps:
-
Click API & Services Section and select Credentials from the left side bar
-
Click Create Credentials and select OAuth Client ID
-
If this is the first one, you will need to Configure Consent Screen by following the steps. Pick options that make sense for your organization. If you are not sure, you can pick these:
- Select user type: Internal
- Set Your company OAuth as name, and add your own email as support email and developer contact information
- You do not need to add any scopes
- Click Save and continue, and return to creating credentials
-
For Application type, choose Web Application
-
Fill in the Name field, for example
Deepnote OAuth -
In Redirect URIs, click on Add URI and enter
https://deepnote.com/auth/bigquery/google-oauth-callbackas redirect URI
-
Click Create
-
From the newly created Client, copy
CLIENT_IDandCLIENT_SECRET
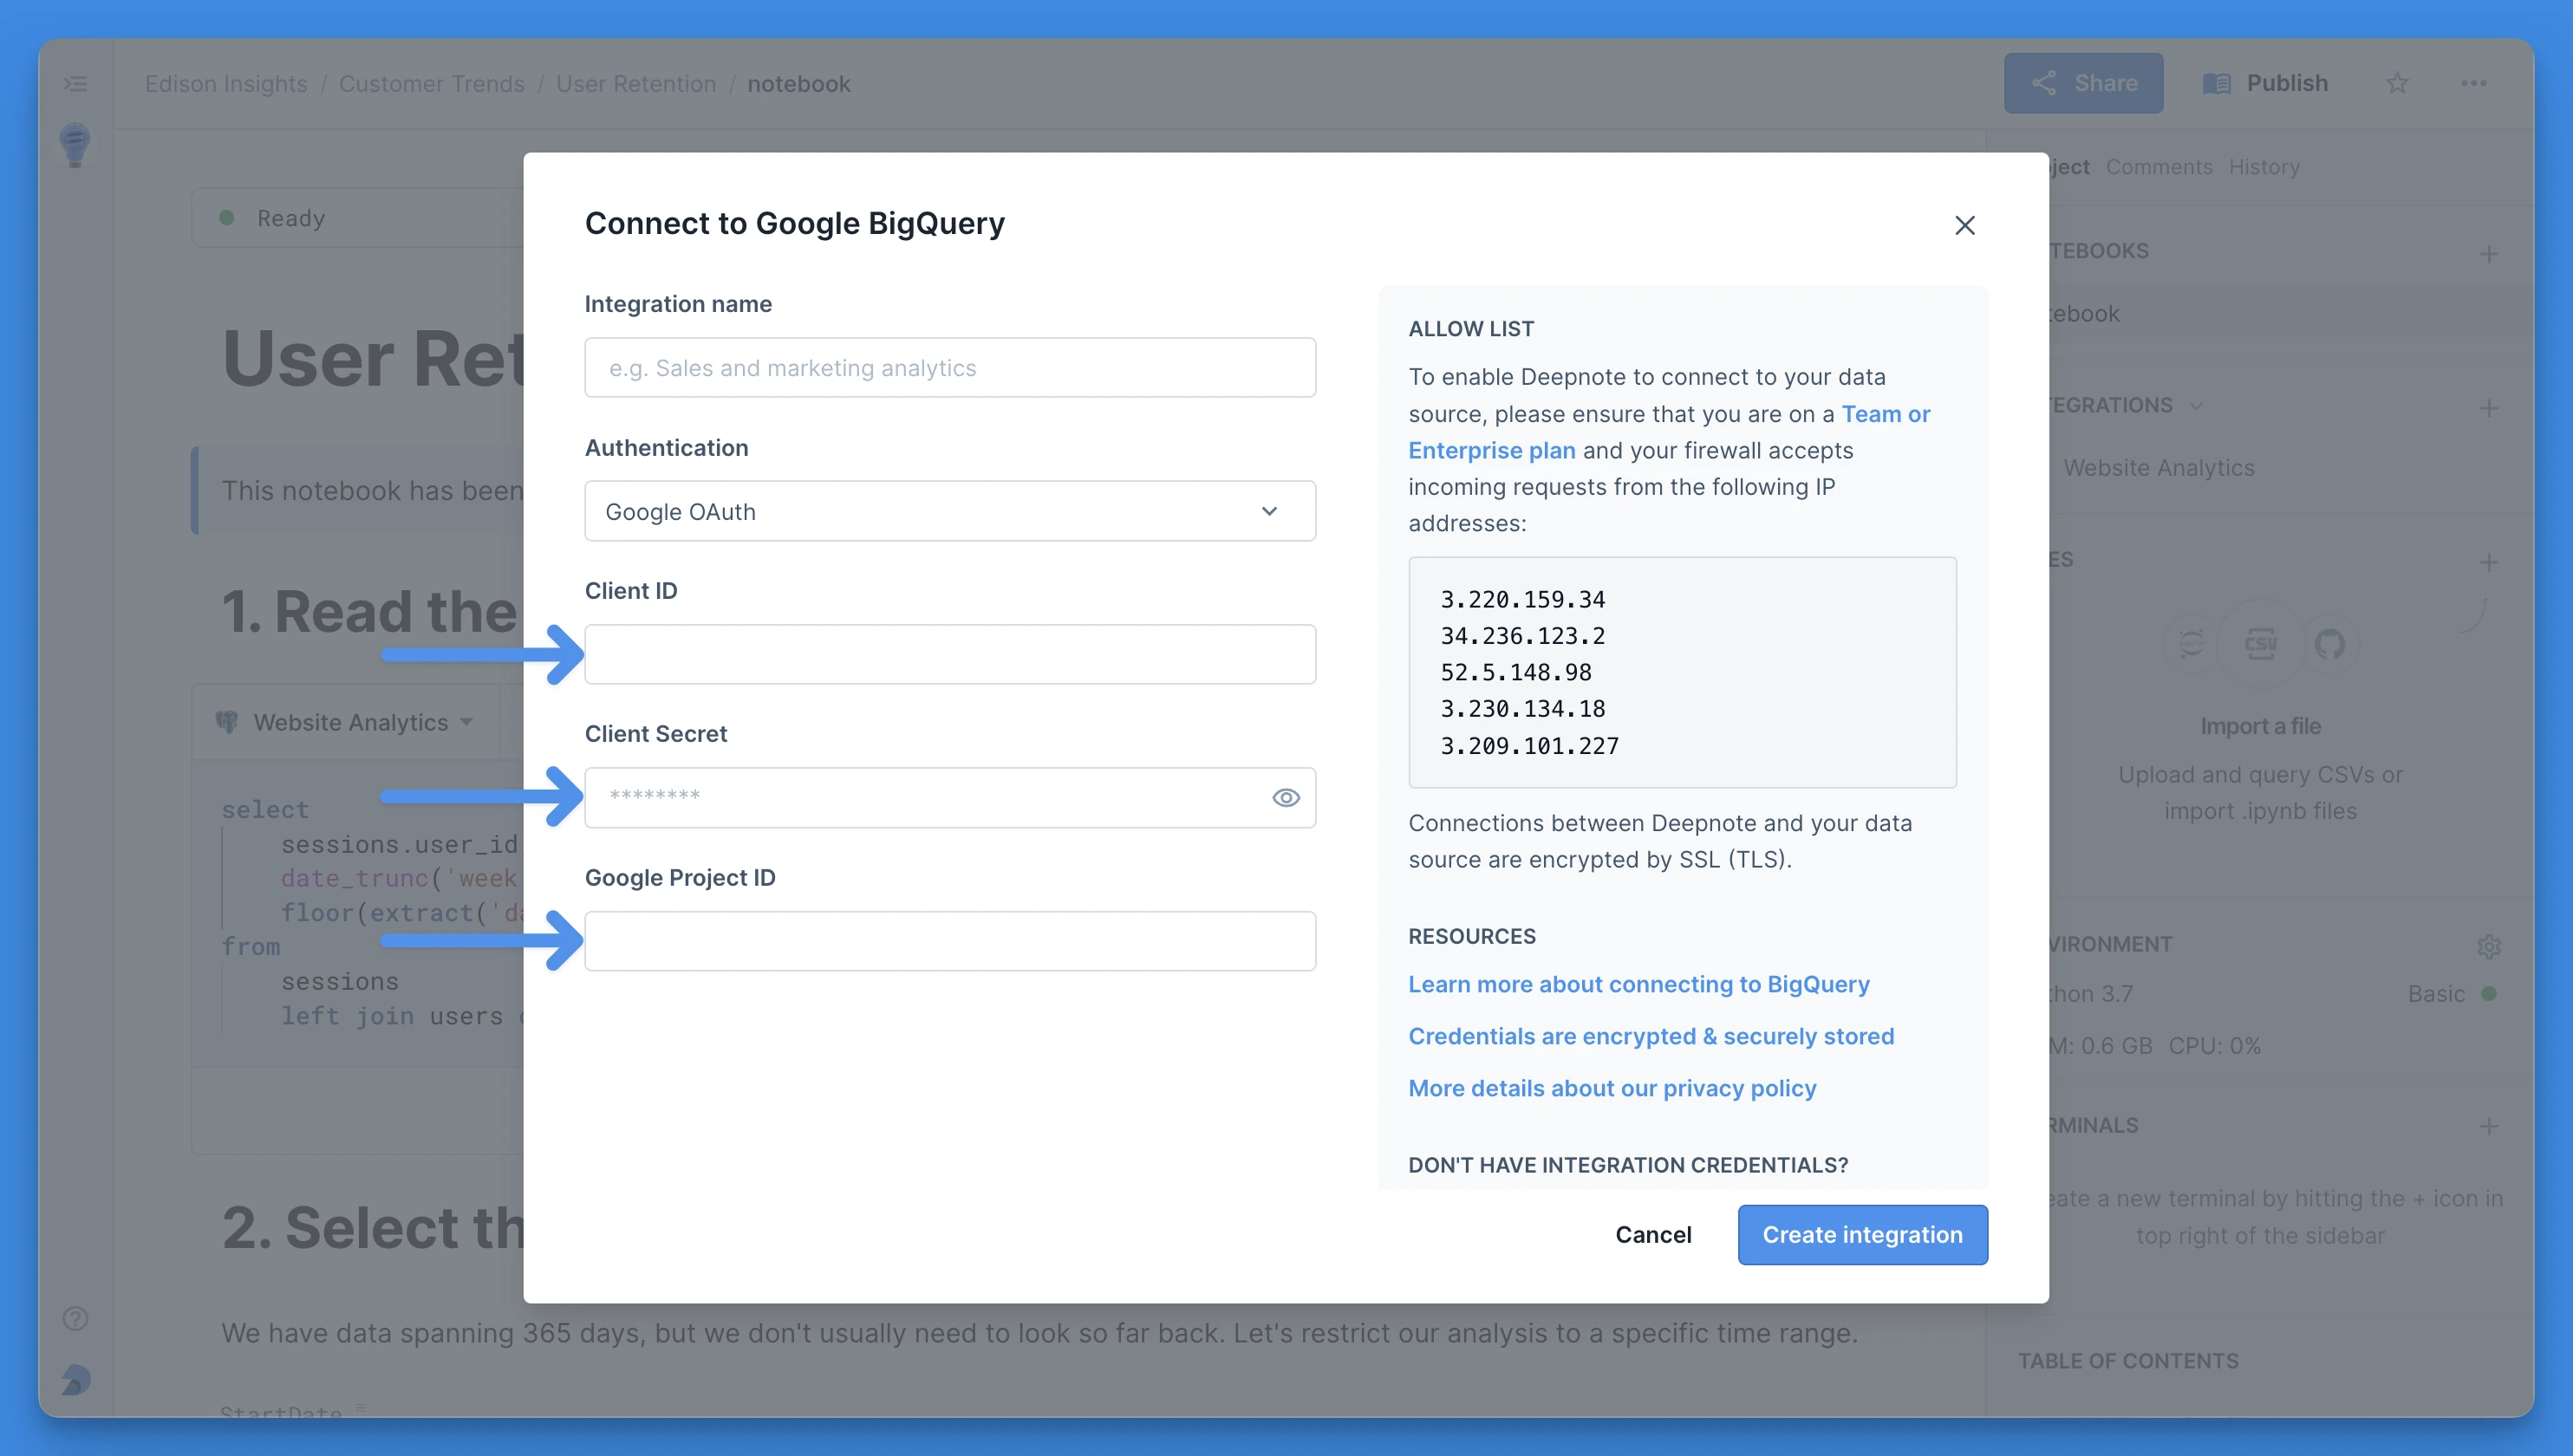
👉 Now head back to Deepnote and add the Client ID, Client Secret, and Project ID to the Google Big Query integration pop up. You will of course need to make sure you've selected Google OAuth as the authentication method.
Querying data with user-specific authentication
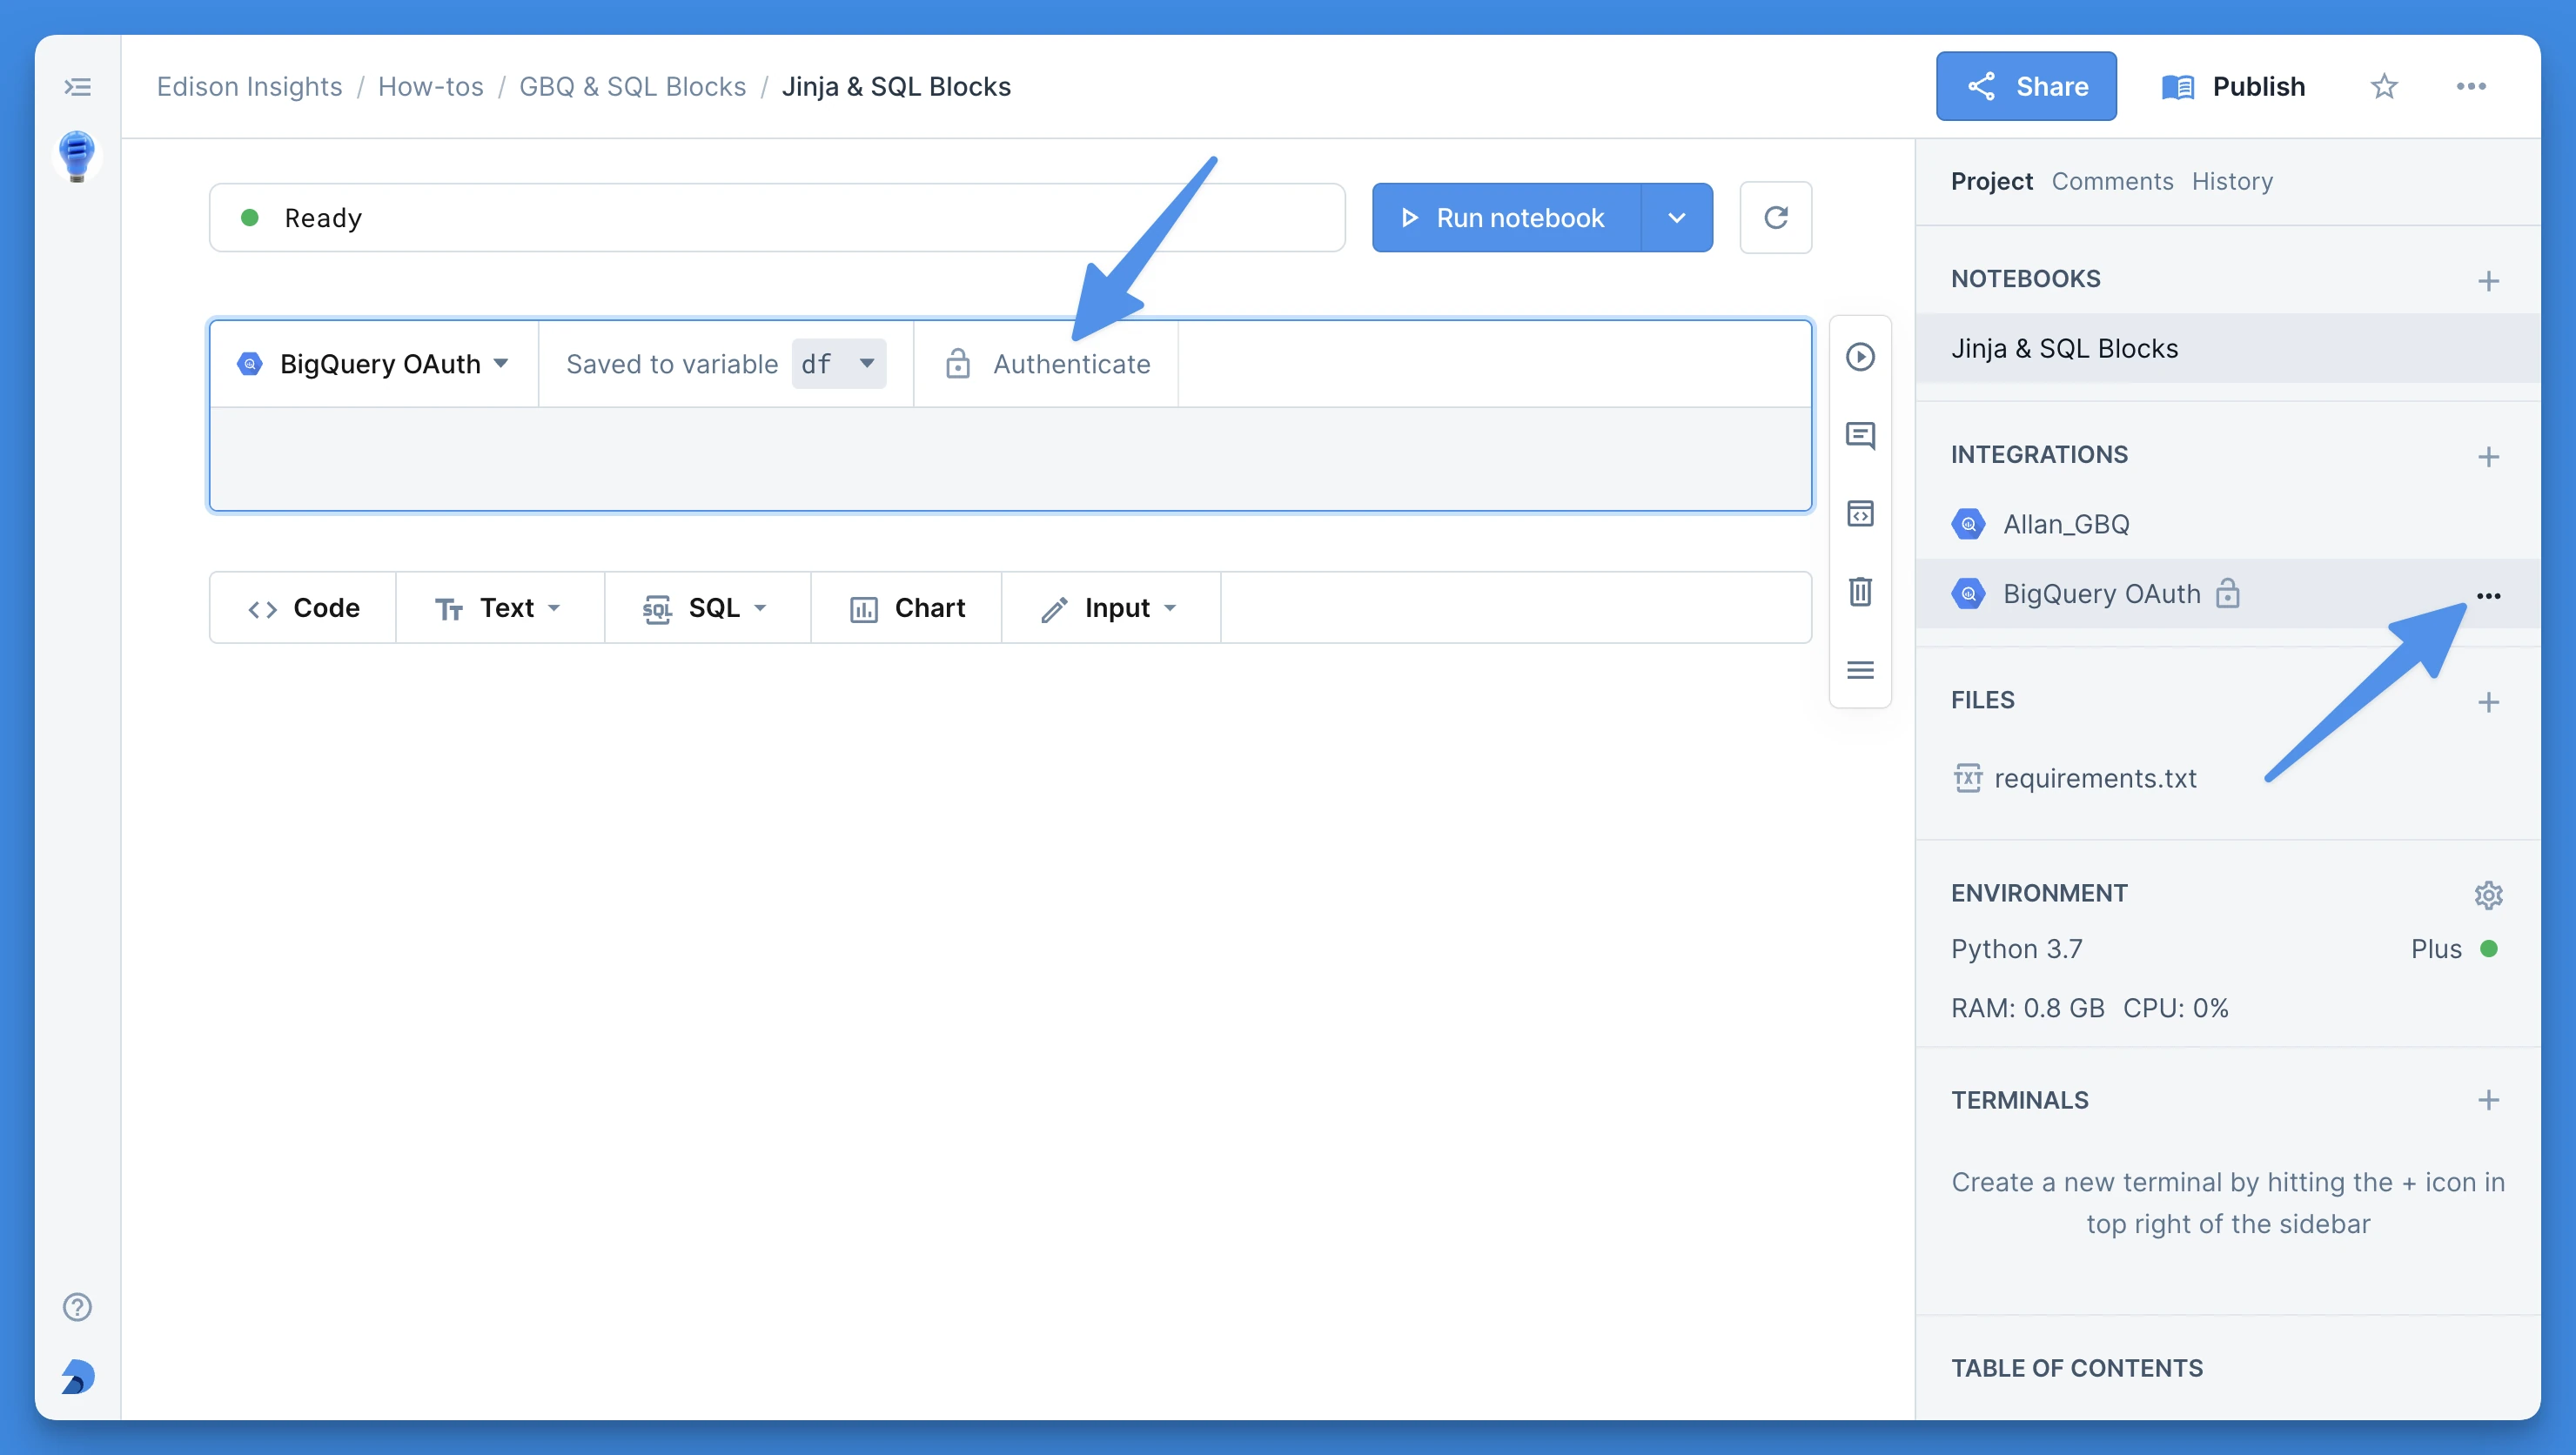
Since every user will have to authenticate using their own Google account with this method, the notebook provides a few ways to accomplish authentication (also see the image below). Any of the following actions will initiate authentication for a given user:
- Pressing the Authenticate button on a SQL block
-
- Clicking Authenticate integration from three-dot menu of the integration in the right sidebar
-
- Responding to a request for authentication when executing an SQL block
When you create an app from a notebook that uses the integration, every app user will need to authenticate with their own account. They will be prompted to sign in using Google during the execution of the app. The results they see will depend on the permissions they have.