Projects
You have a very specific task that requires a coding environment, notebooks, and data. That's where projects come in — a collaborative container for everything you need to complete your analysis.
What can you do with projects?
Projects do a lot, from shared data sources across multiple notebooks to native version control. Here are some highlights:
- Projects contain notebooks and therefore can be used to organize related work (e.g., EDA notebook, ML notebook)
- Projects define your environment — including the Python version, required libraries, and the machine specifications (i.e., RAM, number of cores).
- Projects have their own file system and provide access to database integrations.
Creating a project
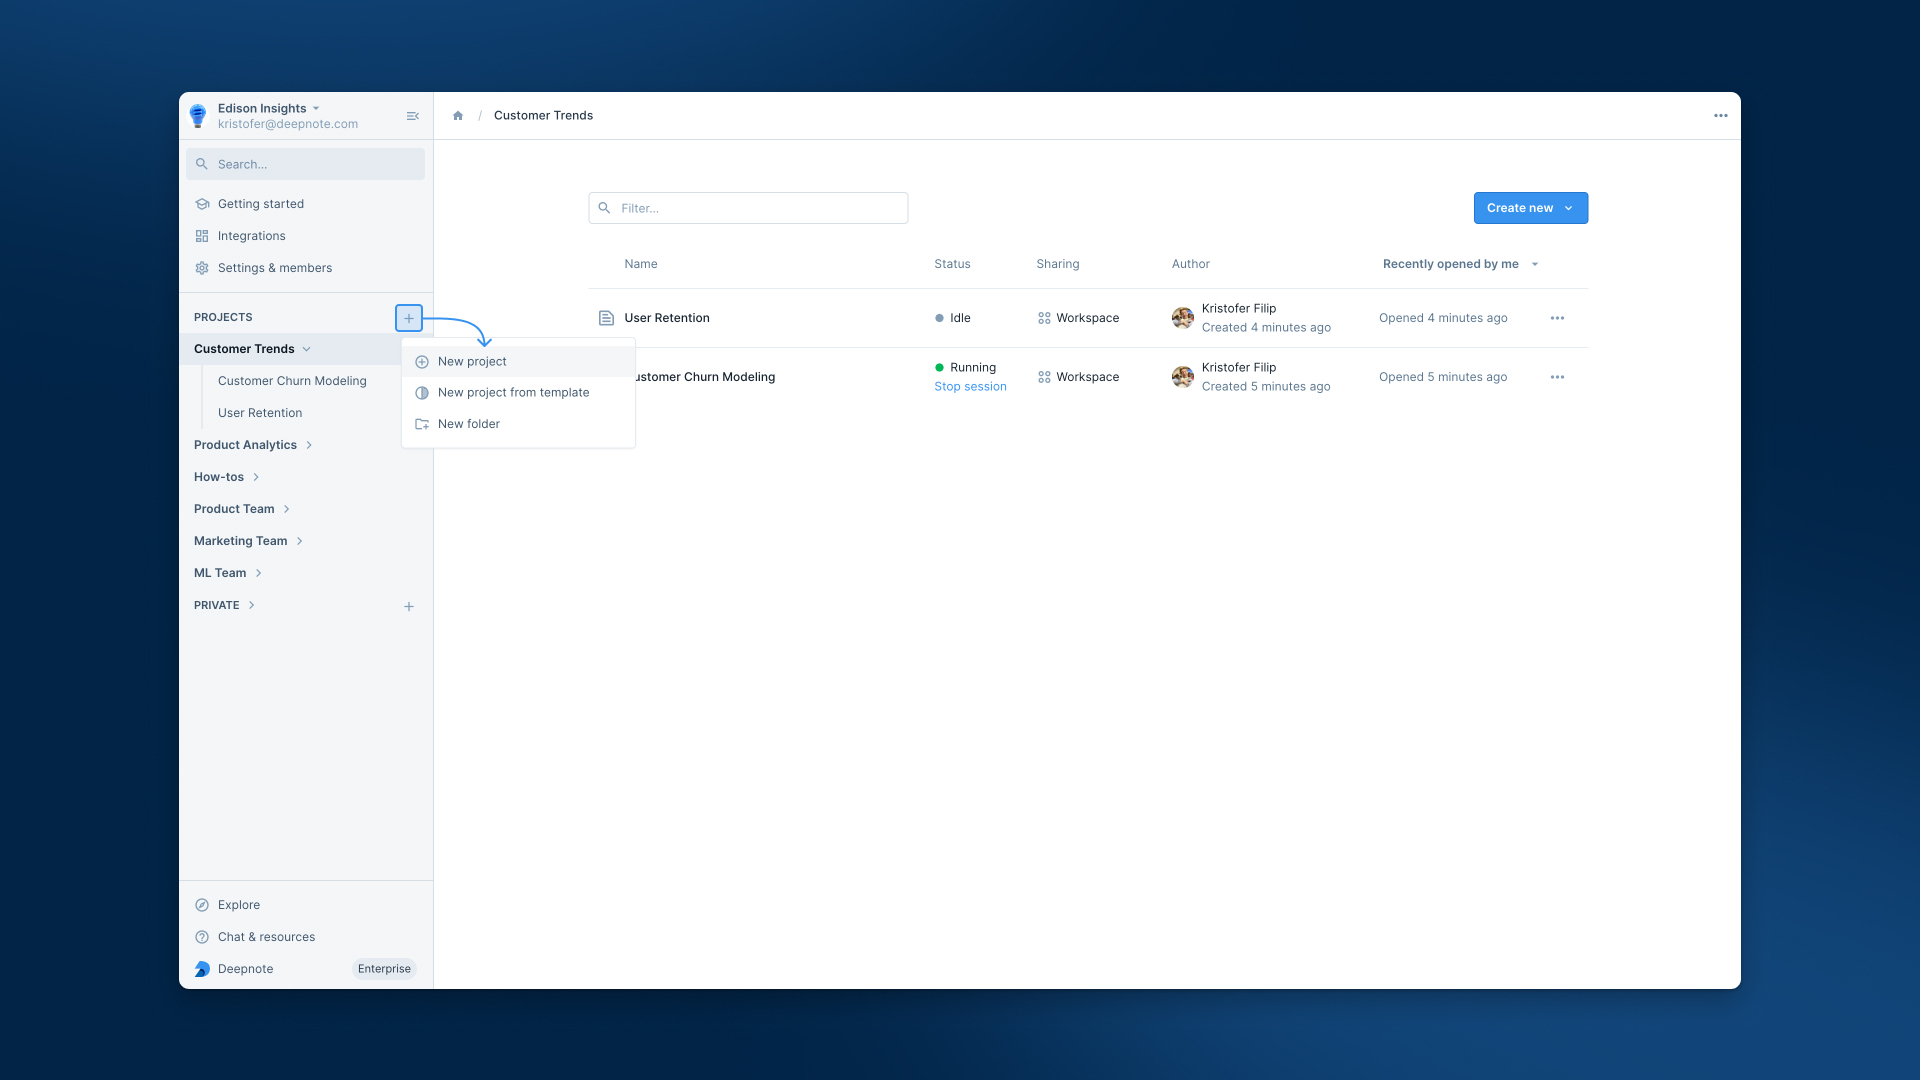
From the left panel in your Workspace, you can click the "+" symbol next to PROJECTS to create a new project, either from scratch or from Deepnote's built-in templates. In addition, clicking on the ellipses beside a project will provide options for creating, duplicating, and moving projects (and more).
Don't forget that you can arrange your projects into folders here, too. Just drag and drop them to suit how you like to organize your work.
Let's move to the newly created Project panel now. Notice that the left panel has changed and you are focused on the context of your Project.
Learning the most important bits
The Project sidebar on the left contains sections for your notebooks, integrations, files, the environment, and more. Let's learn about each of these in detail.
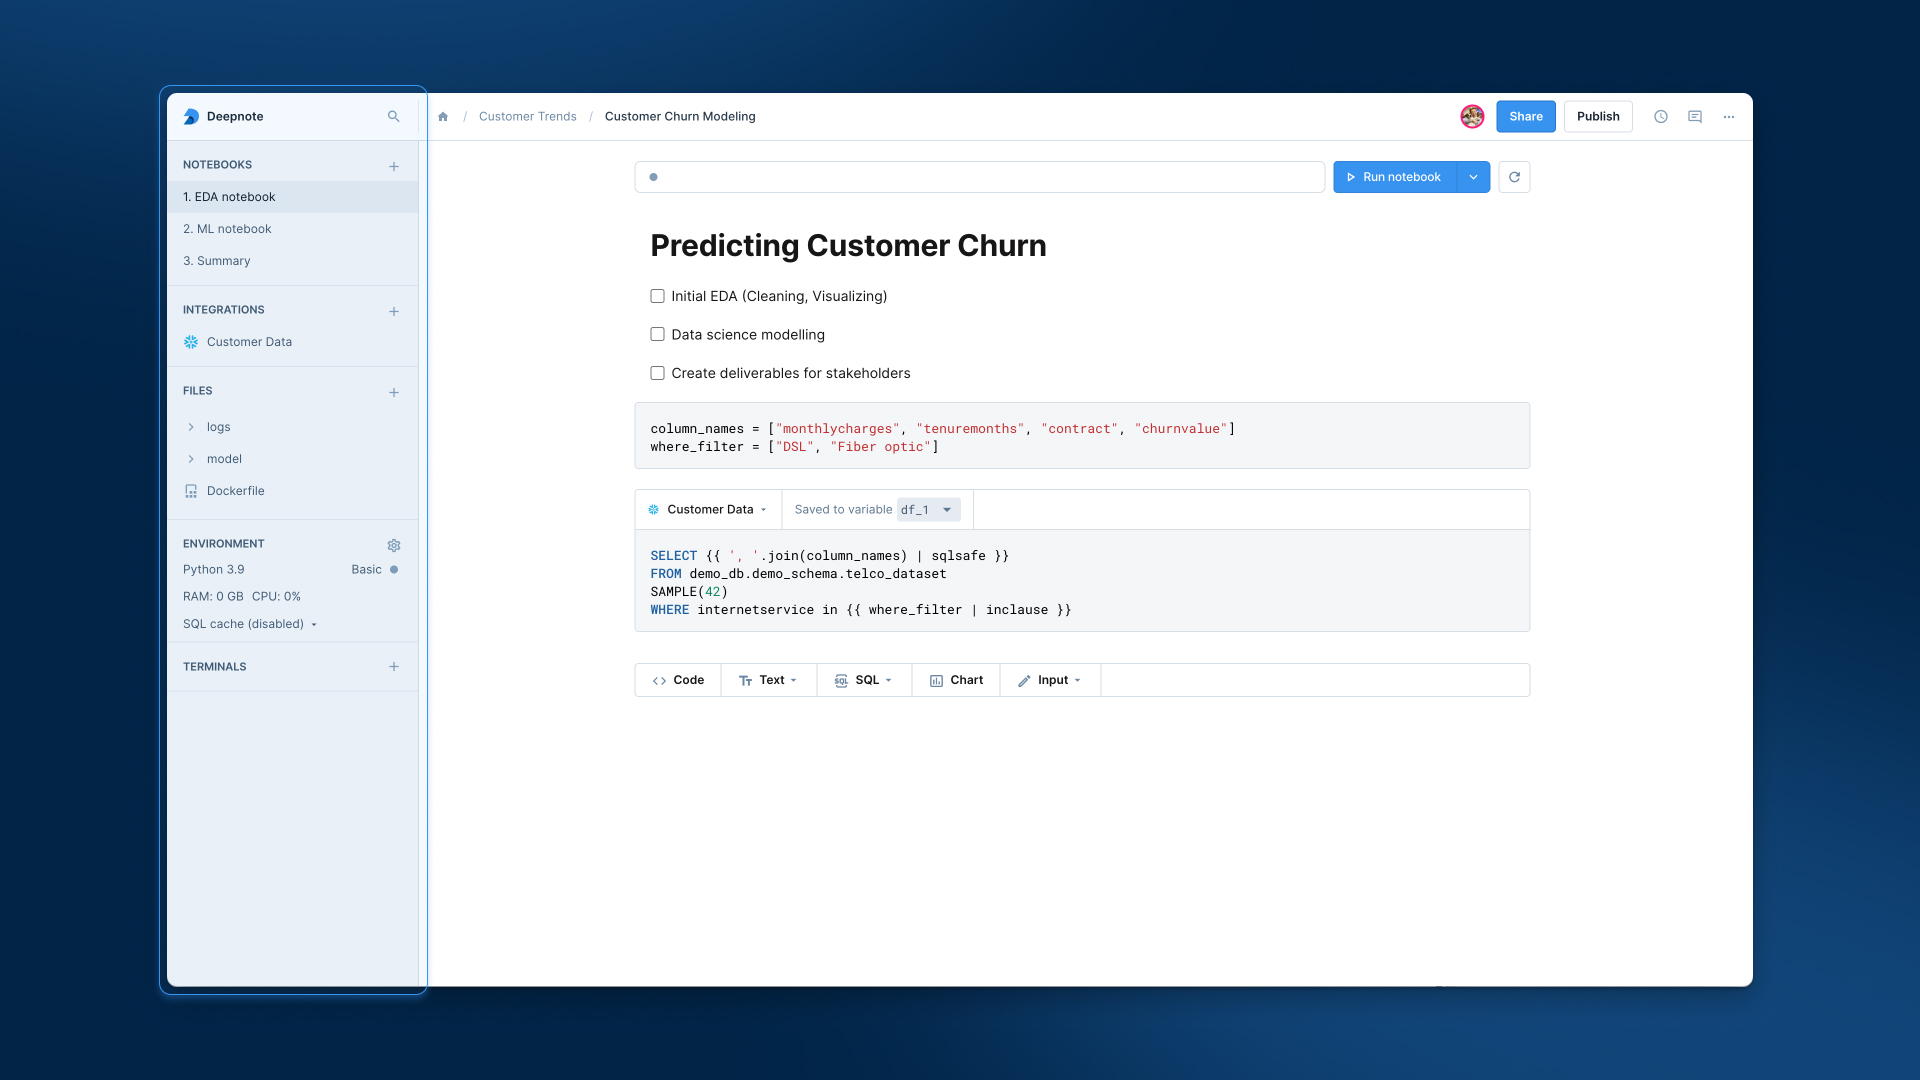
Notebooks
The Notebooks section can contain multiple notebooks. This is helpful since multiple notebooks are often needed to accomplish an overall goal. Read more about Deepnote's powerful notebooks here.
Integrations
The Integrations section is all about hooking up resources to your project. It's where you connect to databases/warehouses, buckets, Docker container registries, and secrets. Your collaborators can share these connections without having to bother with additional setup.
Files
Think of this section as your local computer's file system. It's snappy like that. Drag a CSV into it or upload the other scripts and files you need. The file system is a shared space for all notebooks within a single project. To learn more about working with the file system, read our general guidelines here.
Environment
Time to get serious. You probably want to know how to configure your environment. Let's dive into what you can do in the Environment section.
First, click on the ⚙️ icon. You should now see your environment configuration options (shown below). Follow me.

Machine: If you need a "beefier" machine, this is where you can choose one. If you're on a Team or Enterprise plan, you get unlimited hours on a 16GB, 4vCPU machine. To learn more about machines in Deepnote, click here.
Built-in environments: From the dropdown menu (under Environment) you can choose between any of the built-in Python environments. They come pre-installed with the most popular libraries so you can begin working immediately. The default environment is Python 3.11.
Initialization notebook: There are times when you want to run some "starter" code before your notebook is used. You can place such code in a notebook called 'Init'. Read more about setting up custom project initialization.
Incoming connections: Toggle this switch if you need to spin up a web server from Deepnote. Yes, this is perfect for hosting the Airflow console, Streamlit apps, TensorBoard, and much more.
Terminals
We all need a CLI every now and then, even if we are notebook lovers. You can create terminals by clicking the + button in the Notebooks section and selecting Create a new terminal from the dropdown menu. Terminals appear below your notebooks in the same section. Read more about terminals here.
Project templates
In case you'll find yourself attaching the same integrations, or using the same environment in most of your projects, you can save the project as a template. To do that, click on the dropdown option of your project, and click "Add to templates".
Going deeper with projects
Projects can do so much more. We encourage you to check out how to use comments, how to version projects and view their history, and how to connect to GitHub.