Snowflake with Okta
Deepnote allows each user to authenticate to Snowflake using their own credentials.
With the Snowflake and Okta authentication you can give every member of your Deepnote workspace their own set of credentials. You can ensure higher security by using short-lived tokens and enabling the use of multi-factor authentication. Follow the principle of least privilege and use granular access control for various Snowflake resources to ensure everyone can only access the data they need.
The integration leverages Snowflake's External OAuth with Okta.
How to set up the integration with Okta and Snowflake
There are a number of steps to follow which will be described in the following sections. Some steps are optional and will be noted as such.
- Create an OAuth Compatible Client to Use with Snowflake
- Create an OAuth Authorization Server
- Collect Okta Information
- Create Identity Provider
- Create Security integration in Snowflake
- Create Snowflake integration in Deepnote
Create an OAuth Compatible Client to Use with Snowflake
- Navigate to the Okta Admin Console.
- Click Applications & click Create Application.
- Select Native App as an application type
- Click Create.
- Enter a name for the application.
- In the Login redirect URIs box, add the full Snowflake account URL
(i.e.
https://<account_identifier>.snowflakecomputing.com)* and the Deepnote redirect URIhttps://deepnote.com/auth/snowflake/okta-callback. (your Deepnote redirect URI might be different if you are hosted on a single tenant deployment) - Click Save.
- In the new application, in the General settings, click Edit.
- Check Refresh Token, Resource Owner Password, and Authorization Code
- Click Save.
- Click the Edit in the Client Credentials section
- Select the Client secret option.
- Click Save.
- In the Client secrets container, generate a new Client Secret, and store it together with Client ID from the section. These two values will be known as the
<OAUTH_CLIENT_ID>and<OAUTH_CLIENT_SECRET>, respectively in the following steps.
Create an OAuth Authorization Server
- In the Security menu, click API, then click on Authorization Servers.
- Click Add Authorization Server.
- Enter a name.
- Enter the Snowflake account URL (in this format:
https://<account_identifier>.snowflakecomputing.com) as the Audience value. - Click Save.
- Copy the Issuer value. Its format should resemble
https://dev-390798.oktapreview.com/oauth2/auslh9j9vf9ej7NfT0h7. This value will be known as the<OKTA_ISSUER>in the following steps. The suffix after the last slash (auslh9j9vf9ej7NfT0h7in this case) will be known as<OKTA_AUTHORIZATION_SERVER_ID>. - Click on Scopes & add a Scope.
- To add a Snowflake Role as a scope, enter the scope by having the name of the the Snowflake role with the
session:role:prefix (e.g., for the Snowflake Analyst role, entersession:role:analyst). If you want to let users use their default roles in Snowflake, addsession:role-anyscope. - Click Create.
- Click on Access Policies & add a Policy.
- Enter a name and a description for the policy. Assign it to the client created earlier (the Okta application) and click Create.
- In the newly added Access Policy, click Add Rule.
- Enter a rule name.
- Select the authorized Grant Types. You should select Resource Owner Password and Client Credentials along with any others that match your organization’s policies.
- For scopes, you can select all scopes or select the desired scopes created earlier that clients assigned to this policy will be able to request (if selecting scopes, be sure to include offline_access for refresh tokens). Configure any additional settings as needed.
- Click Create Rule.
Collect Okta Information
- In the Security menu, click API.
- Click** Authorization Servers** and select the server created in the section above.
- Copy the Metadata URI value, open it in a new browser tab, and paste the URL in the address bar.
- You should see JSON text in the browser. You can work with this text in a text editor or in the browser itself.
- Locate the
jwks_uriparameter and copy its value. This endpoint will be known as the<OKTA_JWS_KEY_ENDPOINT>in the following steps. - Locate the
token_endpointparameter and copy its value. This endpoint will be known as the<OKTA_OAUTH_TOKEN_ENDPOINT>in the following steps. - Locate the
authorization_endpointparameter and copy its value. This endpoint will be known as the<OKTA_OAUTH_AUTHORIZATION_ENDPOINT>in the following steps.
Create Identity Provider
- In the Security menu, click Identity Providers, then click on Add Identity Provider.
- Select OpenID Connect
- Enter a name for the identity provider.
- Select
openid,offline_access, and any of the scopes defined in the above section as scopes in the identity provider. - Fill in Client ID and Client Secret with credentials of the OAuth client application created in [the first section](snowflake-with-okta#Create-an-OAuth Compatible-Client-to-Use-with-Snowflake).
- Fill out Issuer as
<OKTA_ISSUER>from the second section above. - Fill in Authorization, Token and JWKS endpoint as
<OKTA_OAUTH_AUTHORIZATION_ENDPOINT>,<OKTA_OAUTH_TOKEN_ENDPOINT>and<OKTA_JWS_KEY_ENDPOINT>respectively. - For the “If no match is found” option, select Redirect to Okta sign-in page.
- Click on Create.
- From the Identity Provider overview, copy the Identity Provider ID. It will be referred to as
<OKTA_IDENTITY_PROVIDER_ID>in the following steps.
Create a security integration in Snowflake
-
Optional: Remove
external_oauth_any_role_mode = 'ENABLE'below if you want your integration to work only with specific Snowflake roles (defined as scopes earlier). -
Execute this code in Snowflake:
create security integration external_oauth_okta
    type = external_oauth
    external_oauth_any_role_mode = 'ENABLE'
    enabled = true
    external_oauth_type = okta
    external_oauth_issuer = '<OKTA_ISSUER>'
    external_oauth_jws_keys_url = '<OKTA_JWS_KEY_ENDPOINT>'
    external_oauth_audience_list = ('<snowflake_account_url')
    external_oauth_token_user_mapping_claim = 'sub'
    external_oauth_snowflake_user_mapping_attribute = 'login_name';
Create a Snowflake integration in Deepnote
-
After heading back to Deepnote, create a Snowflake integration as described in our main Snowflake docs.
-
Create a Snowflake integration in Deepnote and select Okta as the authentication method.
-
Fill in the fields CLIENT_ID and Client Secret based on
<OAUTH_CLIENT_ID>and<OAUTH_CLIENT_SECRET>of your Okta Client application created in [the first section](snowflake-with-okta#Create-an-OAuth Compatible-Client-to-Use-with-Snowflake). -
Fill in Identity Provider as
<OKTA_IDENTITY_PROVIDER_ID>. -
Fill in Authorization Server as the
<OKTA_AUTHORIZATION_SERVER_ID>. -
Optional: If you didn’t set
external_oauth_any_role_mode = 'ENABLE'when creating a security integration in Snowflake, you must fill in Role as defined by the Okta scope (just add the role name and not thesession:roleprefix). -
Lastly, click "Create integration".
Using the the Snowflake integration with Okta
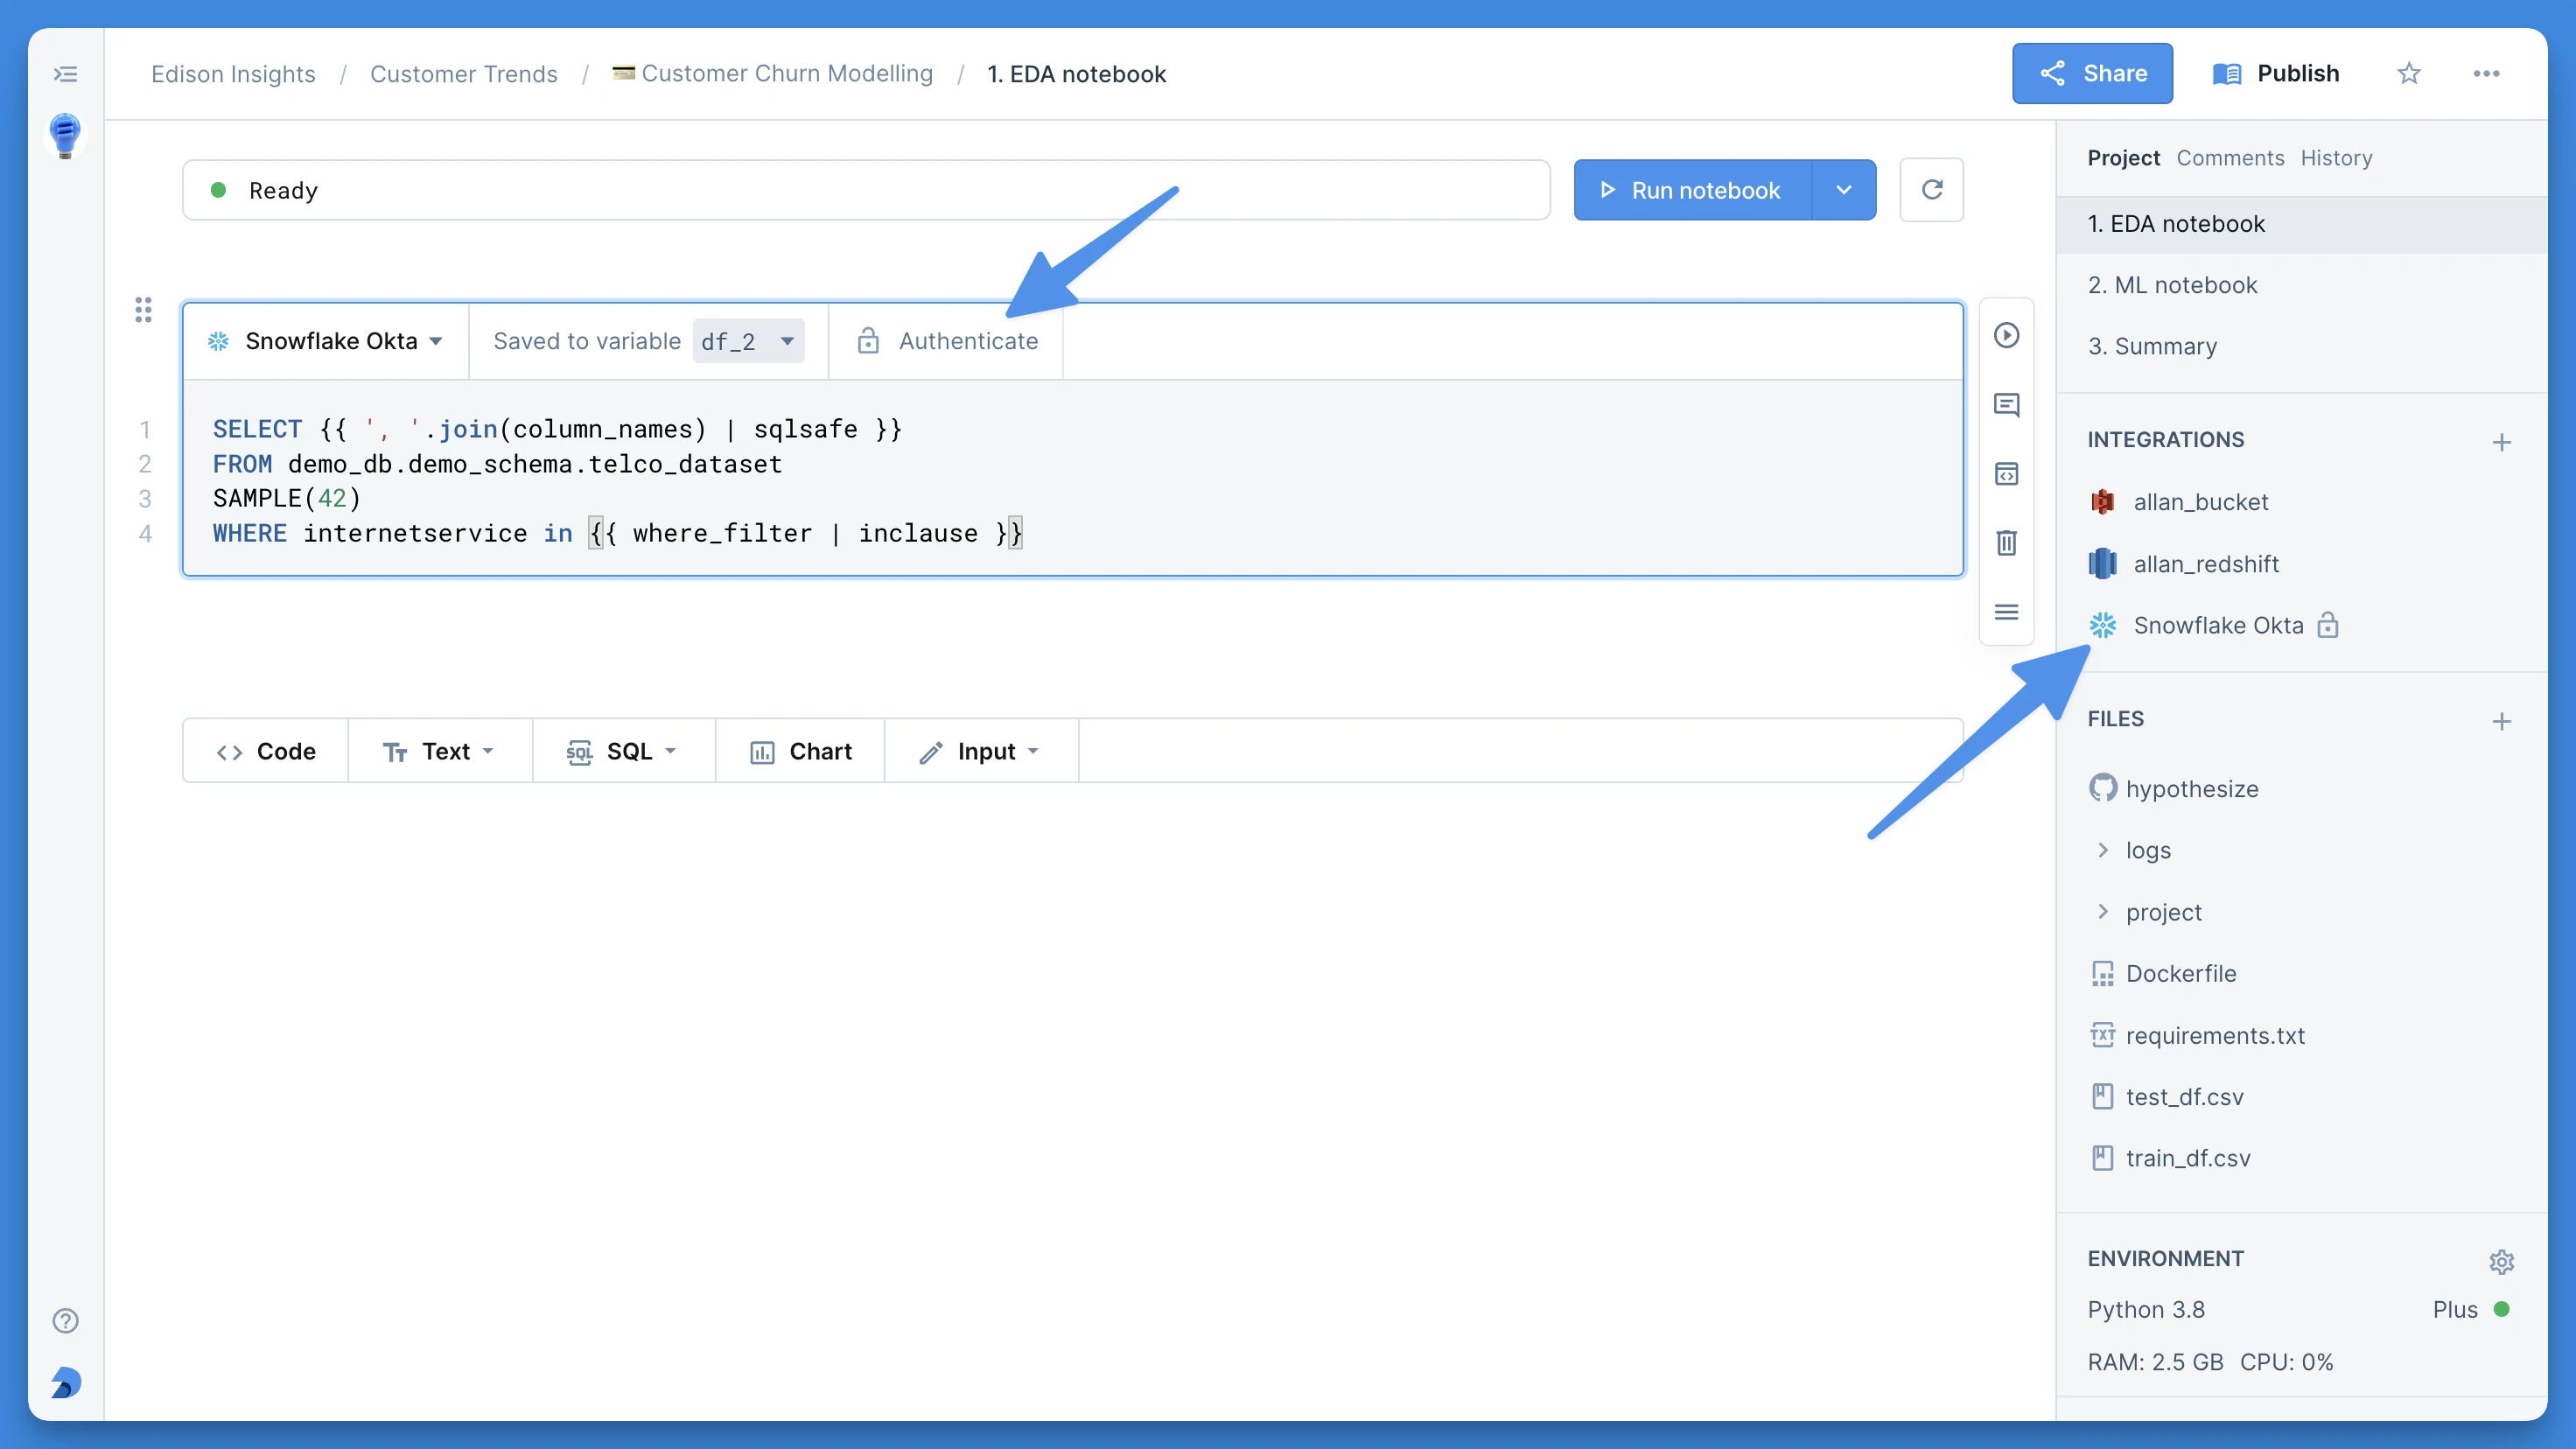
In order to use the integration, every user will have to authenticate using their own Snowflake account. They can do it either by pressing the button on a SQL block with this integration, in the three-dot menu of the integration in the right sidebar, or by responding to a prompt when they execute a SQL block.
When you create an app from a notebook that uses the integration, every app user will need to authenticate with their own account. They will be prompted to sign in using Okta during the execution of the app. The results they see will depend on the permissions they have.
Using user's custom attribute as a role
If you are using directory sync to push users from your organization to Deepnote, you might want users to use different Snowflake roles when they use the same integration. One of the approaches is to give every user in Okta a custom attribute with the desired role, which Deepnote can use when assuming the role for that user.
-
First, create the user's custom attribute in Okta and ensure it's synced to Deepnote. In Okta, navigate to Profile Editor in your directory, and create a user attribute for your default Okta user. For example, you can name it "deepnote_snowflake_role." Then, open the Profile Editor for the user the app you've created in the steps above is using, and make sure the attribute is mapped from the default user. Next, open the profiles of your users and fill in the desired values for them. The custom attribute should be synced to Deepnote within 15 minutes. You can reach out to our support to make sure the values are synced properly.
-
Until now, there has been no effect for integration users in Deepnote. In Deepnote, open the Snowflake integration settings. Fill in the "User custom attribute" field with the value you've just created, and save the integration. You can "Re-authorize" the integration to check if everything works as expected. You'll see an error if the custom attribute is not synced yet, and Deepnote is not aware of the desired role. If that happens, please reach out to our support.