Streamlit apps
Streamlit is a popular open-source Python framework for creating interactive dashboards and data apps. With Deepnote's native Streamlit support, you can host and share these apps directly in your workspace. All you need is your Python script - Deepnote handles the rest.
Get started by exploring our example apps or watch our quick guide:
Creating an app
There are two ways to get started with Streamlit in Deepnote:
- Drop in existing scripts. Simply drag and drop your
.pyfile into your project's Files section. Deepnote automatically detects Streamlit apps and begins deployment. In seconds, you'll see your live app in the split-screen preview. - Start from scratch. Create a new
.pyfile and write your Streamlit code directly in Deepnote - from simple buttons to complex interactive elements. When ready, click the Create Streamlit app button in the upper right corner to deploy.
Once deployed, use the Open app button to see your app in its full shared state.
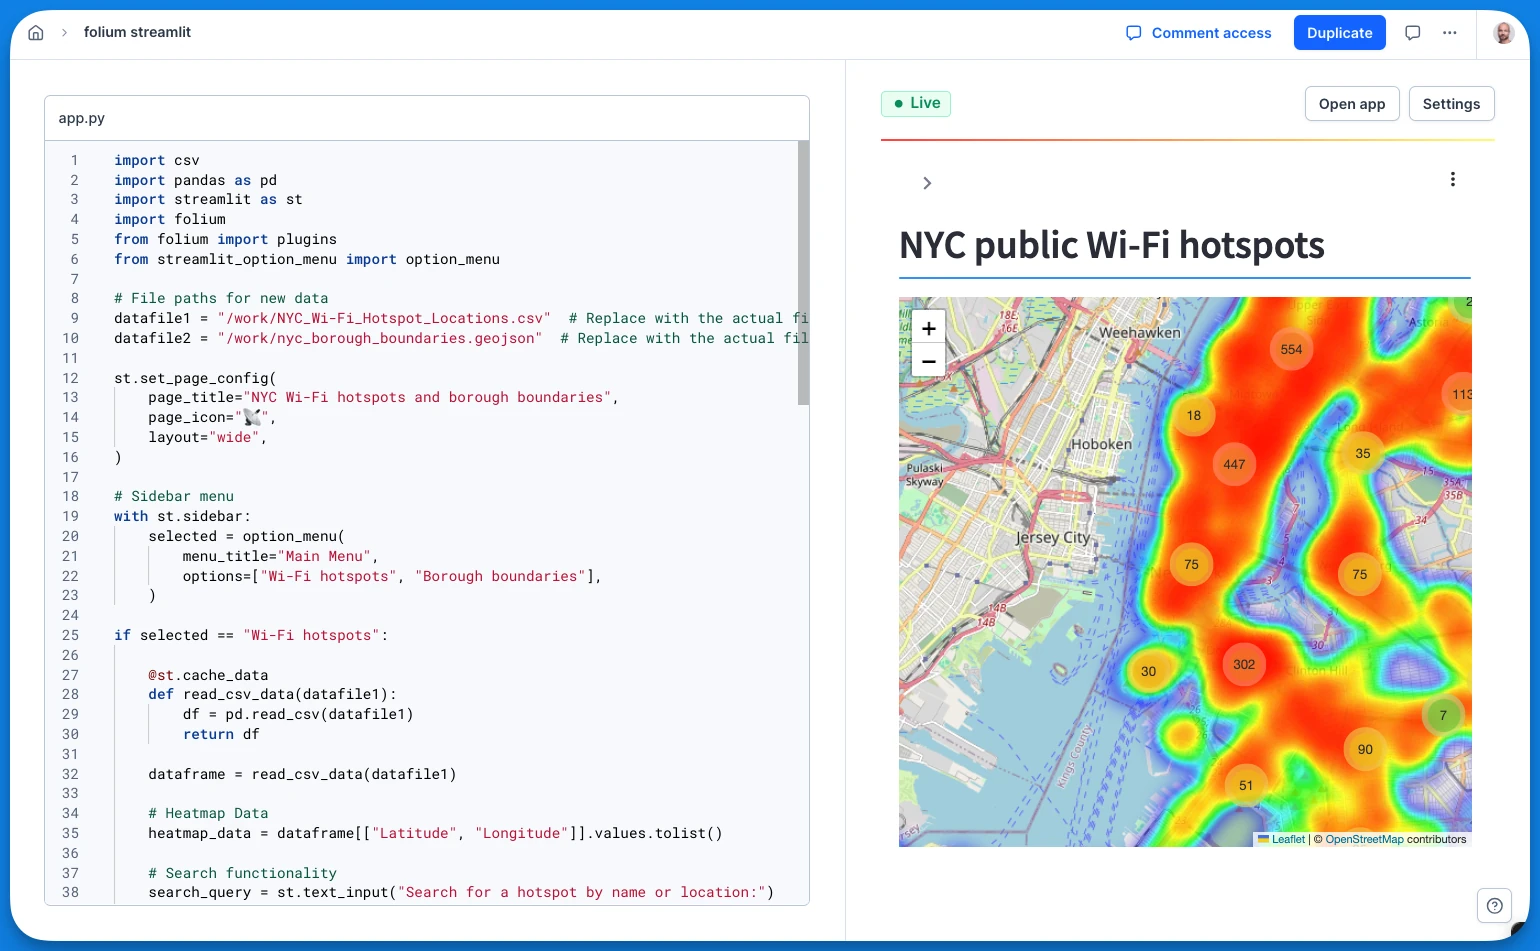
App status
Your project's hardware serves your Streamlit apps. The indicator in the upper left corner of the app preview shows three possible states:
Live: App is deployed and running - visitors can interact immediatelySleeping: App is deployed but project hardware is inactive - visitors will wait for initializationDeploying app: App is updating and temporarily unavailable
Editing an app
When you make changes to your app's code, your updates will be reflected immediately in the live app.
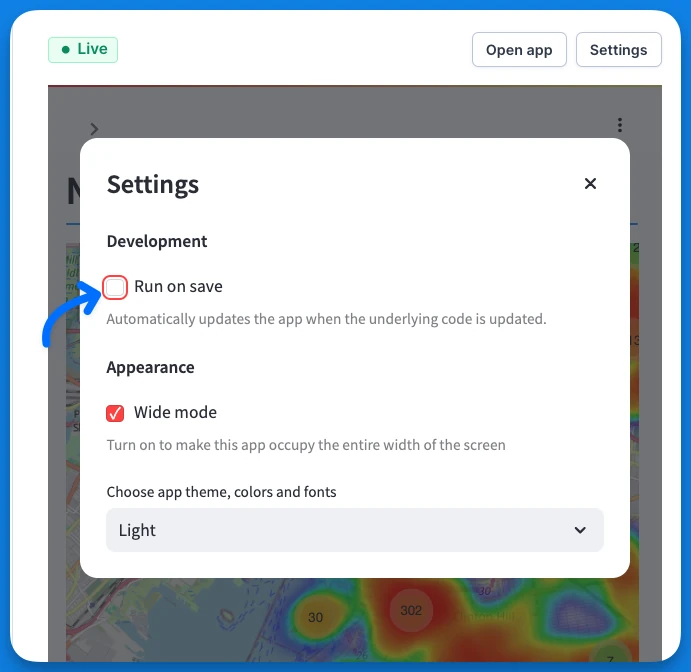
Note: this means anyone viewing your app will see these changes as they happen. If you prefer to control when updates go live, you can disable automatic updates in the Streamlit settings (hamburger icon, Settings) by turning off the Run on save option.
Sharing an app
To share your deployed app, click Settings and Copy link.
Important: Your app inherits your project's sharing settings. To make your app visible to people outside your Deepnote workspace, go to Share in the project header and set link sharing to 'View'. This allows others to view your app and project content but prevents them from making any edits.
Using data
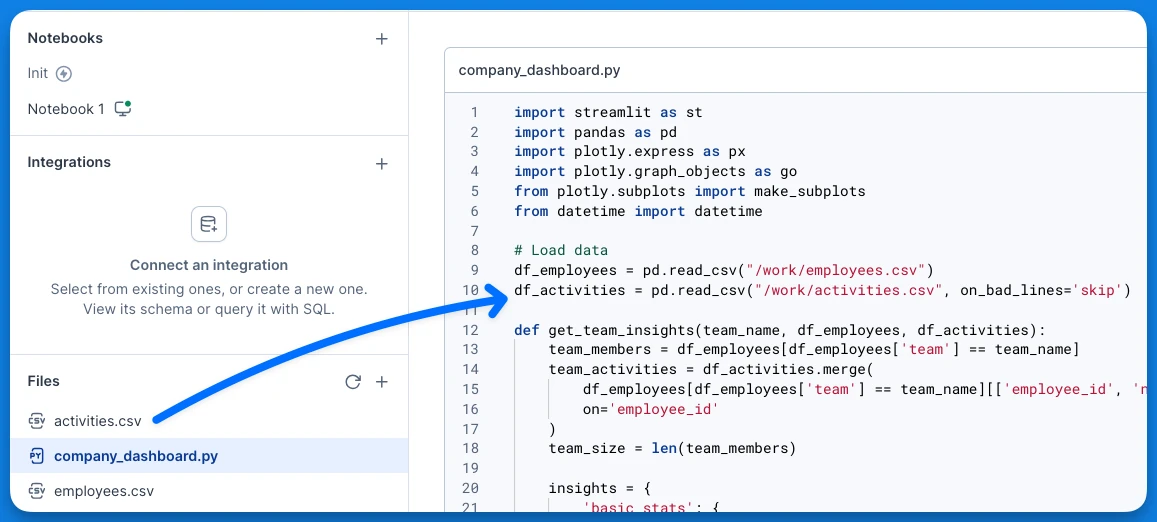
Streamlit apps often need data to visualize. Deepnote's notebook environment is perfect for preparing datasets for your Streamlit dashboards:
- Create notebooks to process your data using our SQL integrations and AI assistance
- Save your results (commonly as
.csvfiles) - Reference these files in your Streamlit script
Need to update your data regularly? Take advantage of notebook scheduling to automate your data preparation.
Using integrations
It is possible to use integrations connected to your project from a Streamlit app.
For storage integrations, such as S3, Google Drive, or Shared Datasets, you can access the files in Python the same way you would in notebooks.
For integrations that rely on specific environment variables (such as database integrations like Snowflake, Postgres, or BigQuery), you need to include a specific code snippet at the beginning of your Streamlit app to populate the app with the required environment variables:
import deepnote_toolkit
deepnote_toolkit.set_integration_env()
An example app that connects to the demo Snowflake integration and renders a DataFrame could look like this:
import streamlit as st
import os
import snowflake.connector
import pandas as pd

import deepnote_toolkit
deepnote_toolkit.set_integration_env()

st.header('Snowflake table')

conn = snowflake.connector.connect(
    account=os.environ["_DEMO__SNOWFLAKE_ACCOUNTNAME"],
    user=os.environ["_DEMO__SNOWFLAKE_USERNAME"],
    password=os.environ["_DEMO__SNOWFLAKE_PASSWORD"],
    database=os.environ["_DEMO__SNOWFLAKE_DATABASE"],
    role=os.environ["_DEMO__SNOWFLAKE_ROLE"],
)

query = f"SELECT * FROM DEEPNOTE.DEMO.COMPANIES"
df = pd.read_sql(query, conn)
conn.close()

st.dataframe(df)
Per-viewer authentication with OAuth integrations
If your integration uses a federated authentication method (Snowflake OAuth, Snowflake with Okta, Snowflake with Azure AD, BigQuery with Google OAuth, or Trino OAuth), the static environment variables shown above are not populated, because each viewer of the app authenticates with their own credentials rather than reusing the project owner's.
Use the helpers in deepnote_toolkit.streamlit_data_apps to obtain a database client scoped to the current viewer.
A Snowflake app that connects via Snowflake OAuth and renders a DataFrame:
import streamlit as st
import pandas as pd
from deepnote_toolkit.streamlit_data_apps import get_snowflake_connection

INTEGRATION_ID = "<paste-integration-uuid-here>"

st.header('Snowflake table')

conn = get_snowflake_connection(INTEGRATION_ID)
df = pd.read_sql("SELECT * FROM DEEPNOTE.DEMO.COMPANIES", conn)
conn.close()

st.dataframe(df)
A BigQuery app that connects via Google OAuth and renders a DataFrame:
import streamlit as st
from deepnote_toolkit.streamlit_data_apps import get_bigquery_client

INTEGRATION_ID = "<paste-integration-uuid-here>"

st.header('BigQuery table')

client = get_bigquery_client(INTEGRATION_ID)
df = client.query("SELECT * FROM `bigquery-public-data.usa_names.usa_1910_current` LIMIT 100").to_dataframe()

st.dataframe(df)
You can find the integration UUID in the URL of the integration's settings page in your workspace.
The first time a viewer opens an app that uses an OAuth integration they have not authenticated yet, the helper renders an Authenticate <integration name> button that opens the same OAuth flow used by notebooks and published apps. After completing the sign-in, they reload the app and the query runs with their identity. Snowflake queries automatically use each viewer's username and (for Okta-mapped roles) their custom-attribute role.
If you need lower-level control, get_federated_auth_token(integration_id) returns the raw {integrationType, accessToken, connectionParams} payload, and prompt_federated_auth(integration_id) renders the authentication prompt without opening a connection.
Customizing app environment
Your Streamlit app shares its environment with your project. If you need to add specific Python libraries you can do so by:
- creating an Init notebook. Every time your Streamlit app starts up, the Init notebook will run before and install the dependencies from your
requirements.txtfile. - creating a custom environment for your project with all the required dependencies.
Limitations
- AI support for editing Streamlit files is coming soon!
- The file upload widget in Streamlit apps is not working - fix is on the way.
- Some Streamlit built-in features have limited functionality:
- The Record a screencast feature is not available